 |
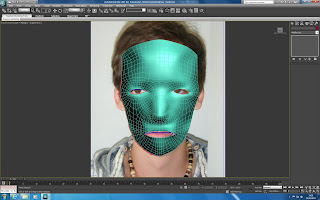
| First basic face. |
To help create a more realistic face the vertexs were also moved closer together to create more of a detailed face, with less of it leading onto the rest of the head. This is difficult to explain but can be seen in the right window in the image below. You can see that the face is a lot more close together as oposed to meeting the rest of the head.
Origional face line.
Final face line.
After i was happy with the beginning of the face I used the symetry tool to create the other half. This saves time and makes the face symetrical. The only issue with this is that you can loose out of detail that may be on one side of the face.


No comments:
Post a Comment