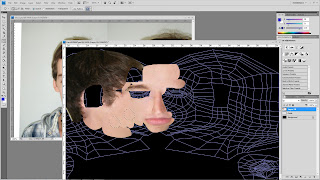
To texture the hair I first saved the UVMap image made in the previous blog and opening it inside of Photoshop. This gave me a clear layout of the shape, the texture would have to fill. The first step was to save the image as a Photoshop file and then apply it as a texture inside Max Studio's on my face, giving the face the outline texture. To create the face image I used patches of skin from the image I used as the guide to creating the face model.
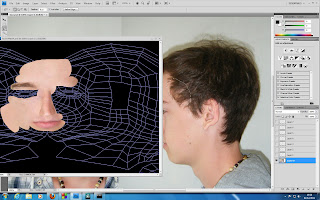 |
| The main creation of the texture |
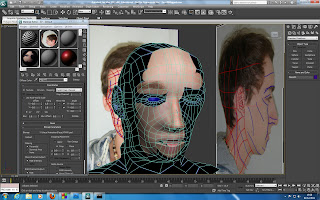 |
| The texture view in Max Studio |
I did this by using the lasso tool to select parts of the skin from the old image and then duplicating them on the texture file. I then scaled and placed them appropriately using the warp and blend tool.
The warp tool splits the selected object into a small number of separate areas, and allows the user to stretch and free form the image.
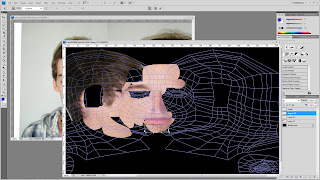 |
| The Warp Tool |
Once the shapes are image sections are in place, I then merged the layers (excluding the background and guide) and used the blend tool to create an texture that appeared to flow better. The blend tool works by selecting an area you wish to make flow into another, and using a sample of the second material's area creates a blend of the too.
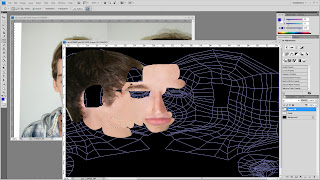 |
| Select the section you want to blend |
 |
| Select the section you want to blend to |
 |
| The blend tool merges the too selections and forms a smooth blend |
|
|
|
Another tool I used, mostly for the lips and soon to be the eyes is the liquidation tool. This allows you to zoom into the image in great detail and use scaled brushes to manually move clumps of pixels around. This helped a lot in moving my lips up and away from my chin. The only draw back from using this tool is that moving to much can blur the image.
The mouth is too close to the chin and to thick round the edges
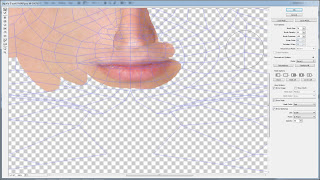 |
| The lips have been pushed up slightly and moved inwards |


No comments:
Post a Comment